Developer Portal
What is On-Behalf-Of authentication?
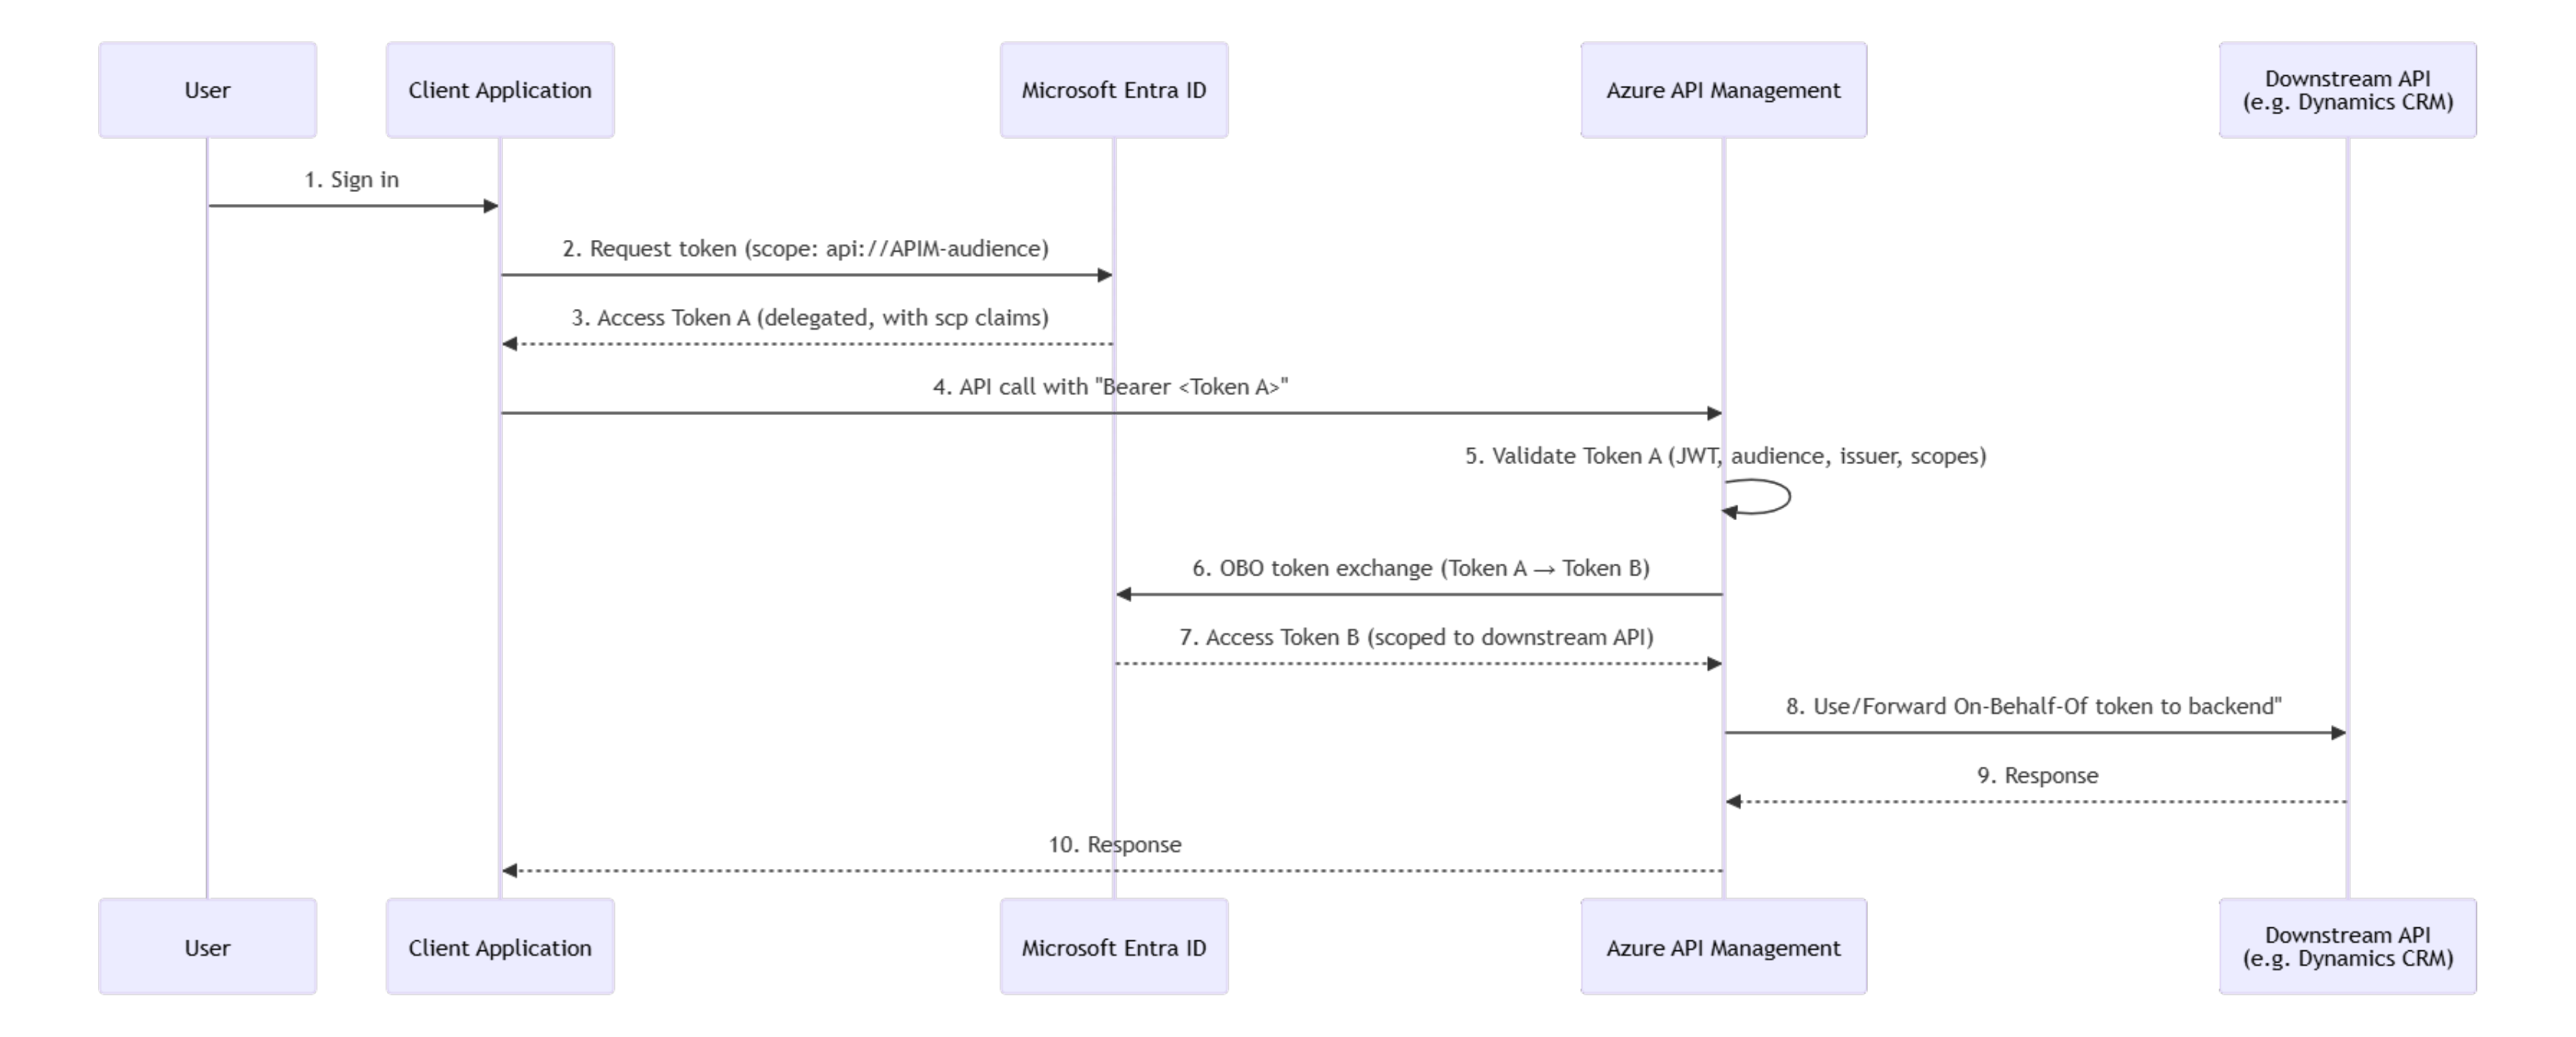
When your application calls our APIs on behalf of a signed-in user, we use the OBO flow to preserve that user's identity all the way to the backend system (e.g. Dynamics CRM). This means the backend sees and enforces permissions for the actual user, not a generic service account. Your app gets a token for the user, sends it to our API, and we handle the rest behind the scenes.
How it works (the short version)
1. Your user signs in to your application.
2. Your app requests an access token from Microsoft Entra ID, scoped to our API.
3. Your app calls our API with that token in the Authorization header.
4. Our API validates the token and checks that it contains the required scope.
5. Behind the scenes, our API exchanges that token for a new one targeting the downstream backend, still representing your user.
6. The backend responds, and we return the result to your app.
You only need to worry about steps 1–3. Steps 4–6 are handled automatically.
Two types of access
Some of our APIs support two authentication modes:
- User-delegated (OBO): Your app acts on behalf of a signed-in user. The user's own permissions in the backend apply.
- System/application: Your app acts as itself (no user context). Permissions are based on app roles assigned to your app registration.
The mode is determined automatically based on the token you send.
System/application auth is the default supported in all APIs. User-delegated (OBO) is only available for certain APIs. These APIs will have such support noted in the summary.
What you need to do
Step 1: Request the right scopes
Your app registration needs API permissions for our API. Specifically, you need delegated permissions for the scopes your app requires.
Typical scopes follow this pattern:
- {domain}.read: read-only access (GET / search endpoints)
- {domain}.readwrite: read and write access (all endpoints)
To add these:
Contact the Integration Team. There is currently no self-service way to set up these permissions. This will be added at a later stage.
Step 2: Request a token with the scope
When your app requests a token from Entra ID, include the scope:
scope=api://{api-client-id}/{scope}
Or use /.default to request all scopes you have been granted:
scope=api://{api-client-id}/.default
Step 3: Call the API
Include the token in the Authorization header:
Authorization: Bearer <your-token>
That's it. If the token is valid and contains a required scope, the request will proceed.
What can go wrong
401 Unauthorized: Your token is invalid, expired, or has the wrong audience. Do note that an invalid subscription key (which is used for both authentication modes) can also produce this. The invalid subscription will give the following error:
Access denied due to missing subscription key. Make sure to include subscription key when making requests to an API.
while the invalid token will give you:
Unauthorized. Access token is missing or invalid.
403 Forbidden: Your token is valid, but does not contain any of the scopes required by the endpoint you are calling. Check that your app registration has the correct permissions and that admin consent has been granted. The Integration Team can help with verifying this.
Key things to know
- Scopes control which API endpoints your app can call on behalf of a user. They do NOT control what the user can do in the backend; that depends on the user's own permissions in the downstream system.
- A read-only scope (e.g., customer.read) gives access to GET and search endpoints. A readwrite scope gives access to most endpoints, including create and update.
- Entra ID includes ALL consented scopes in your token, not just the one you requested. Our API checks that at least one required scope is present.
Powered by Bertel O. Steen central API Team